Drum roll, please!!!!!
Ok, as promised, here are the pictures!
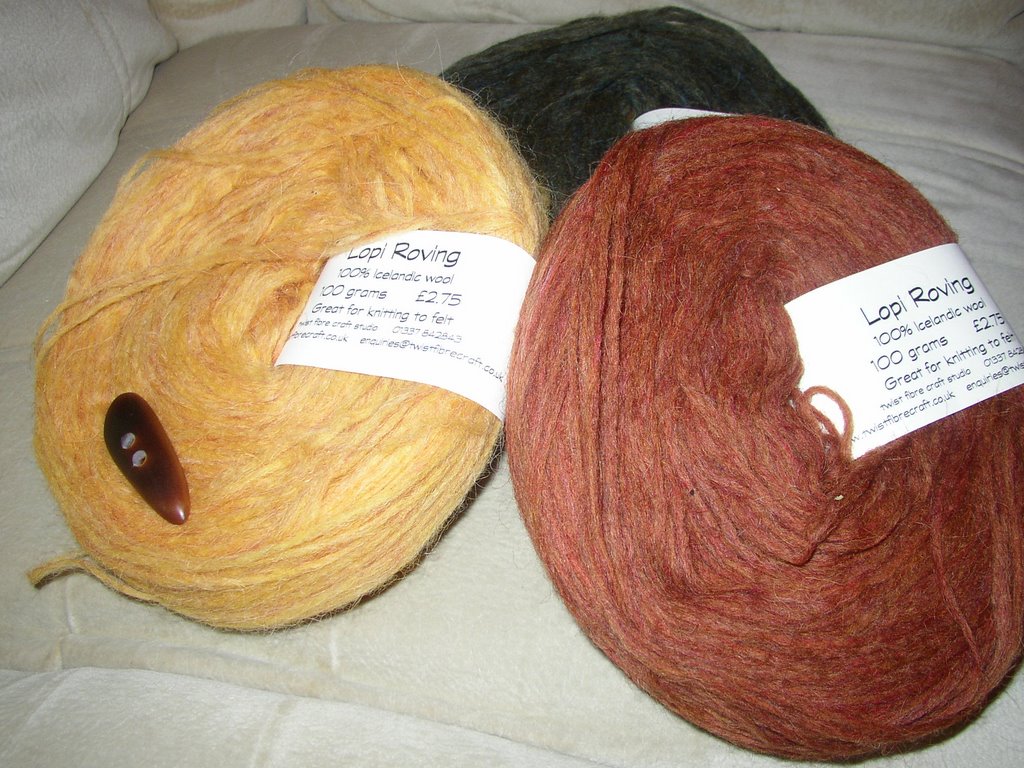
Well it started out like this.......3 wheels of pencil roving from Twist Fibre Craft in Fife, which I bought at Woolfest, but you know all that already. What you want to know is how it turned out!
So it went from that to this in just a few days! Hell its knitted on 8mm needles with double thickness yarn, so it doesn't take too long to knit.

Pattern
Bag
With 8mm cast on 60 stitches and knit in stocking stitch as follows.
With yarn A work 8 rows
With yarn B work 3 rows
With yarn C work 13 rows
With yarn A work 5 rows
Keeping to the 4 stripe sequence, change from yarn A,B and C until 7 repeats of the stripe sequence is done. Cast off. Sew in all the ends and then sew along the bottom and up the side, using 2 strands of roving. Don't pull too tightly or roving will break.
Strap
Using 3 strands of any one of the colours, cast on 3 stitches and knit in stocking stitch for approx 2 meters. Cast off. Sew in ends.
Closure flap
Using 4 strands of any one colour, cast on 20 stitches and knit in stocking stitch for 10 rows, cast off and sew in ends.
When mine was finished the bag was 64cm x 52cm.
Felting
Place it in the washing machine, with 2 pairs of jeans (for agitation of bag!) and 1/2 measure of washing powder. Set on 40 degree wash , make your self a coffee and wait!
I actually had to put it through the wash twice before I got it to the size I wanted!
Drying
Once the bag has felted, pull it into a longer shape. (you can be VERY forceful with it at this point) I managed to put mine to 37cm x 36cm. Spinningfishwife gave me a great tip. Find a cereal box approx the size you want, place it in a plastic bag then pull your felted bag over it, thus keeping its shape whilst drying. It worked for me, I used a large Weetabix box!!!!!!
Assembly of bag
Once dry, sew the closure flap on to the bag.(I used some embroidery thread in the gold colour). Make a hole large enough for your button to go through, by pushing scissors through the flap. Sew button on to bag. To attatch the strap, make a hole on each side of the bag, by pushing scissors through, then push the strap through the hole tying a double knot to keep it in place. Remember that the strap may stretch a bit so don't make it too long.
The yarn is VERY hairy once felted, but can be shaved using an ordinary razor. (I think I will borrow DH's razor, when he's not looking and shave my bag, coz it is VERY hairy!!!!!!!)
(Pattern and instructions by Twist Fibre Craft Studio)
Fanfare and drum roll now required, coz here it is ......................................
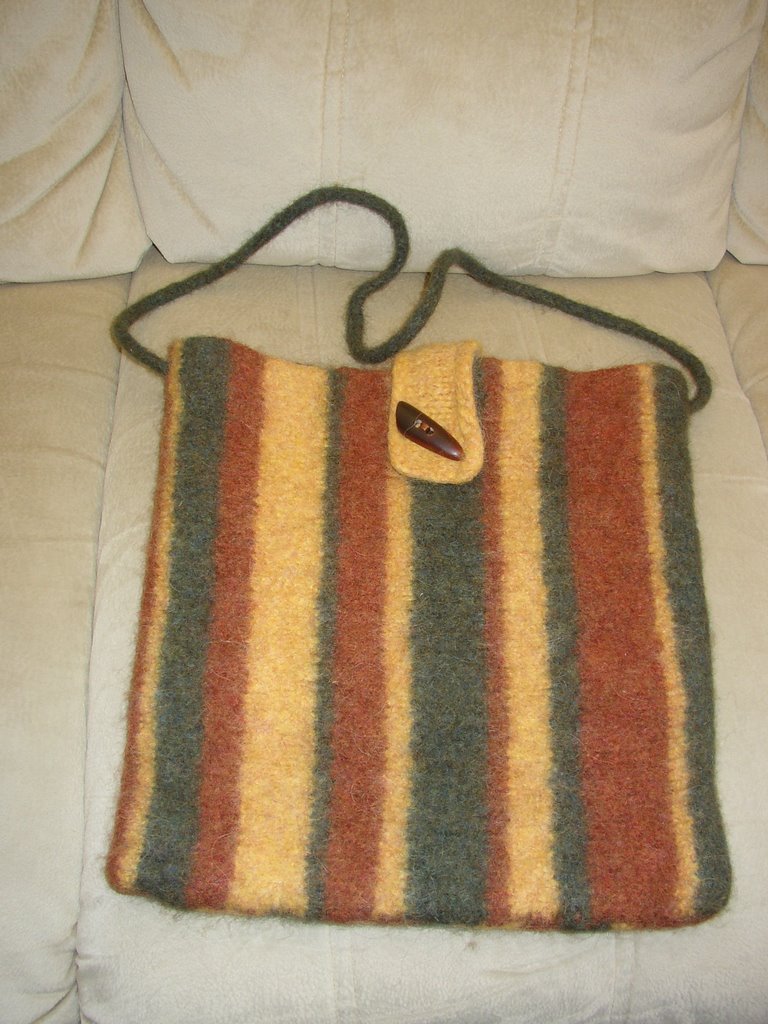
The finished bag...........Woooooooo Hoooooooooo!!!!!!!
I really like it, don't know when I'll use it, but I'm sure I will use it. I really enjoyed doing this, so who knows, there might be some more felting projects in the near future. I quite fancy doing some Fuzzyfeet from Knitty to keep my feet warm in the winter!!!!!!
posted by gourdongirl at 2:34 pm
![]()
![]()

9 Comments:
that is gorgeous. can imagine what my hubby would have to say if I used his razor on a bag, though...
Gorgeous!
That came out nice. I'm not brave enough for felting.
It looks great. How much of the roving did you use?
Lovely colours. Cool bag!
Yay go for the fuzzy feet - I can knit them in a day - total feel good, quick fix kntting.
That's lovely. I like the colours. I have never felted knitting(well not deliberately) but I.ve just bought some Kureyon to have a go.
cool
Lovely! It looks great. The lopi worked really well.
Looking flippin good gal. Flippin good.
Post a Comment
<< Home